

How To Adjust Html Theme Template
What is a WordPress Theme
A WordPress theme is a collection of templates that define the visual attribute of a WordPress website.
The theme encompasses everything that affects the pattern of a website, from headers and footers to the colour scheme, layout, and more.
There are many themes available, free and premium, that fit well-nigh any industry like photography sites, gym sites, barbershop sites, law sites, and much more.
Why Customize a WordPress Theme?
One of the main reasons for building a website is to promote 1's business. What better way to practice it than by creating a unique website that promotes the business' style and design.
Can yous epitome Amazon, eBay, or Google being what they are without their unique, signature blueprint? Of course not, and that's 1 of the reasons why we want to customize a theme. We want to make it unique and fit our business' bulletin.
Additionally, sometimes, or rather, oftentimes, you lot run into a theme that's plagued with bad design, colors that don't go well together, or a theme that's too heavy and impacts that site performance. The theme could be great, except for that one matter that bothers you. Customizing it and irresolute that one matter could solve all your issues and create a improve user feel.
How To Customize WordPress Themes
There are several methods to customizing a WordPress theme.
- Manually, via the WordPress customizer
- With code
- With Elementor
WordPress Child Theme
A WordPress child theme is a theme that has the exact same functions and features of another theme, the parent theme. The child theme is used to customize and tweak the theme safely, without affecting the parent theme and without losing the power to upgrade it. You can larn more child themes here.
WordPress Theme Customizer
So now that we know that it's best to work with a child theme when tweaking them, let'south learn how to customize a theme with the WordPress customizer. To access it, you demand to select a theme from the theme depository (located under the Advent > Themes tabs) Then, go to your dashboard, press on the Appearance tab on the left-hand side and choose Customize.
The main features that you lot can change with this customizer are:
Calculation a Title, a Logo, and a Website Icon
To add together or change your championship, logo, or icon, yous can simply go to the Site Identity panel, and choose each of these elements to change them.
Changing Theme Colors
Some themes volition allow you to change their colour schemes, but not all, and they are usually premium themes, meaning that they cost money. If your theme allows yous to change the color scheme, y'all'll see the option when y'all access the customizer.
Calculation Navigation Menus
The customizer likewise allows you to add and edit the navigation menus for your website, hands.
How to Customize a WordPress Theme With Code


How to Easily Customize a WordPress Theme Using Elementor
You can exercise it straight from the user interface. There'due south no need to modify a unmarried line of code or reload a browser window even once.
Elementor allows you to change every site chemical element chop-chop and easily with just a few mouse clicks and you tin even optimize these features for the mobile platform.
Elementor makes this process much easier by using dynamic content and letting you preview your pages. That mode, yous tin can immediately see how the design changes are going to affect your actual site and content.
Customize The Header and Footer
Elementor allows you full flexibility when it comes to designing your headers and footers. We all know how abrasive this may exist, that you become a theme, and can't change a unmarried aspect of the header or footer design. You need specialized themes, plugins, etc.
With Elementor, it's easy.
1. Create a Header Template
First set up a new header template. For that, become to Elementor > My Templates.

Hither, 1 way to get started is to hit the Add New push at the acme. In the next screen, use the drop-down menu to pick Headeras the type of template you want to design.

Yous can besides get to this screen by clicking on the Header tab in the previous screen and then hitting the big green button that volition appear.

This volition pre-select Header as the template type. Either fashion, you need to add a fitting proper name for the template (and so you'll know what it is after on) and then continue by clicking Create Template.
Doing so volition have you here.

With Elementor Pro, you can choose from premade header blocks. These are blueprint templates you tin can utilize as a starting point for your ain design, which is what we'll practice in this case.
When you hover over a header block, a click on Insertlets y'all beginning designing it right away. Alternatively, click on the image first to see a larger version. Then, you can however hitting Insertat the superlative.

Alternatively, if you want to start from scratch, only close the window past clicking on X in the upper right corner.
2. Modify the Basic Header Blueprint
After you input the new header, the commencement thing y'all'll detect is that the logo and carte we set upwardly earlier are already present.

That is exactly the reason why nosotros ready them upwards and we will talk about how to customize them presently. However, let's first see how to customize the unabridged header department itself.
For that, but hover over it and click the edit button at the meridian. This opens up a whole lot of editing options on the left.

Here's what you tin can command in the different menus:
- Layout – Control the width of the section, the size of the gap between columns, its tiptop, vertical column, and content positioning, its assigned HTML tag, and the general construction.
- Fashion – Here you tin can change the background color including hover furnishings, even add an image or video if you want, add together overlay furnishings, borders, and shape divider as well equally alter typography settings.
- Avant-garde – This function lets you add CSS attributes like margin, padding, and z-index, animations, IDs, and classes. Information technology also enables you to make the section sticky and control responsive settings (more on both later) as well as to add custom CSS.
All of the above is fairly self-explanatory, and you'll apace get the hang of it by merely experimenting around. Be aware, that you can control the settings of the separate navigation carte in the same way. More than on that below.
iii. Customize Header Elements
However, yous can not just modify the header section every bit a whole but also the elements included in it. For example, to customize the site logo, simply click on it. This, too, will provide you lot with editing options on the left-hand side.

In the case of the logo, this gives you the following options:
- Content – Change paradigm size, alignment, and where it links to.
- Style – Control width and superlative, add CSS and hover effects, include a edge and box-shadow if you want.
- Advanced – Hither you lot basically find the same options as for the header section.
Use the settings to customize the logo in any fashion you want and so it looks skillful in the header. Besides, annotation that every element has its own type of options, and then be sure to check each of them.
four. Add together Elements
Of course, with Elementor you are besides able to add together elements to the header. But click the symbol on the acme right to see what's available.

When editing a header template, Elementor volition automatically brandish relevant blocks at the top of the list that makes the near sense for the circumstances. In this instance, these are things like site logo, nav menu, and site title.
Then, for example, if you want to add the site title next to the logo, merely drag and drib information technology in there. However, the header template that I chose currently only allows me to add it above or below the logo. But, this is a problem easily remedied.
In a example similar this is, first hover over the existing header and utilize the plus symbol to add together a section above information technology.

Hither, click on the majestic button to choose a three-column blueprint.

And then, drag the elements from the existing header section into the new one and add the site title in the center.

Only expect, the styling is totally dissimilar! No trouble. Just correct-click the existing header and select Copy. So, correct-click the new section and here selection Paste Style. Elementor will then use the style of the existing section, which you tin close afterward. More info on this characteristic here.


Customize Unmarried Mail Template
In Elementor, you can also customize a unmarried post template. Hither's how:
1. Create a New Template
Creating a template works in the usual way. However, this fourth dimension choose Single as your template type. And then, below that, selection which single template you wish to edit. In this example that is Mail.

If you wanted to create a new page design, modify your 404 page (more on that after) or edit a item custom postal service type, y'all would choose something else. In either case, enter a name and continue.
In the next screen, you can pick from pre-designed templates as usual. Even so, in this case, nosotros want to create a new template from scratch. Then, click the X on the top right to shut this window.
2. Gear up Up the Preview
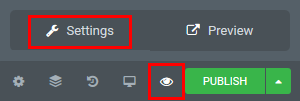
Side by side upward, set up the preview window to an existing post. Yous tin can do this by clicking on the eye icon at the bottom of the editor options and then Settings.
In the menu that opens up, under Preview Dynamic Content as choose Post. After that, in the next line, you can search and cull an existing post by name.
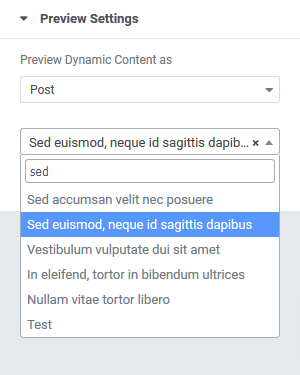
One time you lot have washed and then, hit Apply & Preview. While you won't be able to see anything at this point (since there is nothing on the page yet), it will tell Elementor to use that post'due south data from now on. You lot will soon see what that means.
3. Build the To a higher place the Fold Section
First off nosotros'll create the higher up the fold section of the post. Here, you lot will typically find things like the post title and metadata similar author, engagement, and category.
The get-go step is to click on the plus sign and create a single-column section.

When yous do, in the layout section you have the possibility to control its width, height, positioning, and styling. In this case, there is not much to do here. As well, don't worry, you lot tin can ever go dorsum and make changes later.
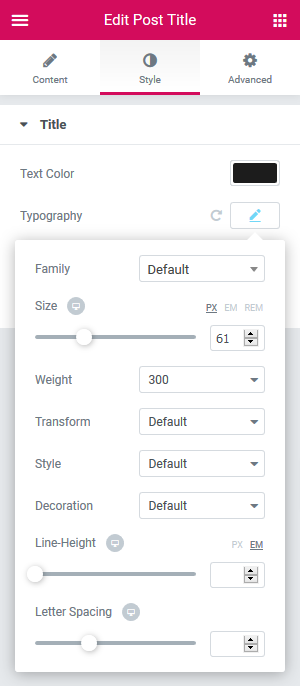
Side by side up, pull the post title widget into the new section.

When you practise, be sure to use all options available to you to adjust the pattern and layout to your liking. For example, here are my settings to make it wait similar above:
There'south also one absurd feature that you should learn about. When you click on the wrench symbol for the post title, you lot can add static content earlier and after your dynamic data.
For example, if y'all were creating a template for a certain postal service category such as news items or recipes, you could add this to the post title like this:

This style, this data would show up for every single post in that category. Since I am building the general template for all of my posts hither, I won't use that at this point, but I thought it was an important side annotation for you.
Nether the mail title, nosotros will at present insert the Post Info widget to brandish the post metadata.
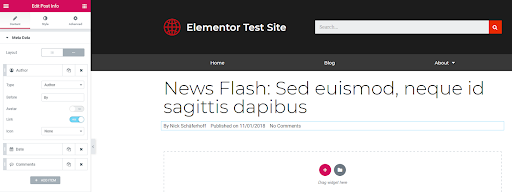
Here are the settings that I use:
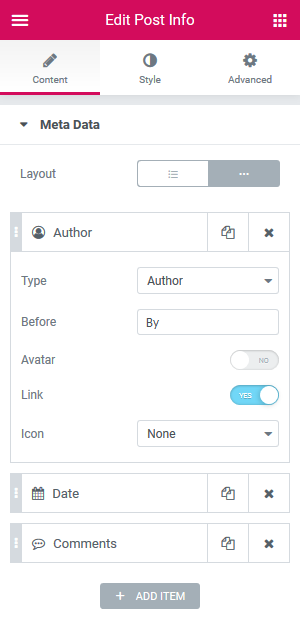
Plus, I used the Style options to make the blueprint fit the rest of the page. Exist certain to do the same.
four. Set Up the Mail Trunk
Afterwards the post head, it'southward fourth dimension to create the body of the folio. If you want this part to have a unlike pattern than the head, it is an option to set up a new section for it. However, I keep it simple, so there is no need to do that.
The first affair we desire to insert is the featured prototype. For that, y'all can place the widget of the aforementioned proper name under what is already on the page.

I basically did not change any of the settings just just left everything equally is.
So, information technology's time for the post content. Hither, too, you have a respective block.

You lot will notice that for both the featured image and post content Elementor automatically pulls what is already on the site. Make any adjustments to the design of the new block that you need such as playing with the typography settings.
Aside from that, that's it. Not too much work to do here so we can motion on to the concluding role.
5. Configure the Mail Footer
In this example, nosotros want the footer of the mail service to include the contour of the author, sharing options, and reader comments. To achieve this, first, nosotros need to create a new section with two columns. To make more space for the author profile, yous can set it to a 66.33 layout.

Afterward that, place the Author Box widget in the left section.

Make certain to manner it according to your needs. I added some background color, some padding, and adjusted the typography settings a bit.
After that, information technology'southward time to add the Share Buttons block on the right side.

Yous can see my settings in the screenshot above.
Later this, all that'due south left is to create one more single-column section underneath and drag and drop the Post Commentswidget into it.

(By the way, if you lot e'er have problems locating any of these widgets, just use the handy search office).

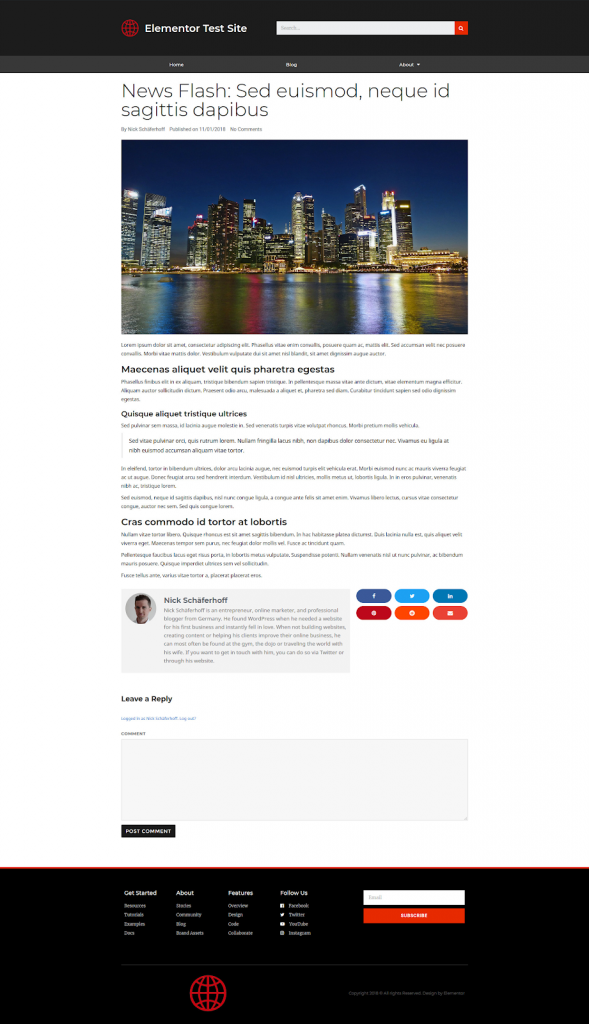
Make any adjustments to the comment section y'all deem necessary (I left it as is) and you are ready to publish. Here is the finished blueprint:
Customize Archive Template
ane. Ready up Your WordPress Archive Template
By at present, you already know the drill about creating new templates. The only departure is that in this case, y'all will choose the Archive as your template blazon.

After that, every bit usual, you go a number of blocks to choose from or can also create your own from scratch. However, for archives, you pretty much just have two Elementorwidgets that are important anyhow.
2. Set the Archive Title
The outset cake I want to talk virtually is the Annal Championship.

As the name suggests, this shows the name of the archive on the page. Besides the usual settings under Style and Advanced, y'all can notice one important option when you click on the wrench symbol under Championship.

Here, you can switch on and off whether Elementor shows the type of archive on the page such equally the function where it says Author: beneath. This happens via the push button nether Include Context.
Past the way, equally usual, you can preview unlike athenaeum past using the preview settings (Eye Symbol > Settings). That way, y'all can see the design for atypical categories, tags, authors, and more. Just keep information technology in listen.
3. Employ the Archive Posts Cake
The second important widget for archives is Archive Posts. This one brings all posts belonging to any archive onto a folio. When yous choose a pre-made template, they are already on there but you can also easily add them yourself with this cake.

Let'southward go over what options it gives y'all for customizing your archive pages:
- Pare – Cull to prove off your posts in classic or card-manner design.
- Columns – Determines the number of columns your posts are displayed in.
- Evidence Epitome – Switch featured images on archive pages on or off.
- Masonry – Display posts in masonry design or not.
- Image Size – The epitome size Elementor should employ on archive pages.
- Title – Do yous want to prove post titles or not?
- Championship HTML Tag – If and then, which HTML tag should be wrapped effectually it?
- Excerpt – Include excerpts from your posts or bear witness only the championship.
- Excerpt Length – Determines the length of the excerpts.
- Metadata – Defines which postal service metadata is bachelor to visitors.
- Separator Between – The separator symbol between metadata information.
- Read More – Include a "read more than" link, yep or no?
- Read More Text – Here, you lot can input what y'all want the "read more than" link to read.
- Bluecoat – Allows you to add more than information to posts, such as categories and tags.
- Badge Taxonomy – Here, you lot tin can make up one's mind what information to include.
- Avatar – With this, you tin switch the profile pic of mail service authors on and off.
In addition to the higher up, you have some more options. Under Pagination, you can define how annal pagination should exist handled. For example, how to display it, the number of pages to include, and text alignment.
Finally, Advanced allows you to define the message to display when a visitor lands on an empty archive. Everything else should be familiar. Just note that the Style options change according to which skin you chose.
iv. Control the Number of Posts per Archive
1 quick note on archive templates. To change the number of posts that announced in an annal (or on your blog page), you need to do so in WordPress under Settings > Reading.

Here, simply input the number of posts yous desire your visitors to run into and save your changes.
Piece of cake Theme Customization With Elementor

How To Adjust Html Theme Template,
Source: https://elementor.com/blog/customize-your-theme/
Posted by: gablewhiparinkes54.blogspot.com
0 Response to "How To Adjust Html Theme Template"
Post a Comment