

How To Draw Madagascar Characters And Color With Prismacolor
Observe how easy drawing roses tin can be in these detailed pace-by-step tutorials.
Gorgeous color and fun organic shapes brand up every unmarried rose — and every single rose drawing. Notice how to describe a rose from stem to bloom step by step in graphite pencil and colored pencil in 2 drawing roses demonstrations from artist and teacher Gigi Chen. Y'all'll discover how ease and accessible cartoon roses tin can be! For more than on how to draw roses, explore Gigi Chen'due south beginner step by step tutorial to create a rose, petal by petal, in ix piece of cake steps.
Drawing Roses with Colored Pencil
Step ane
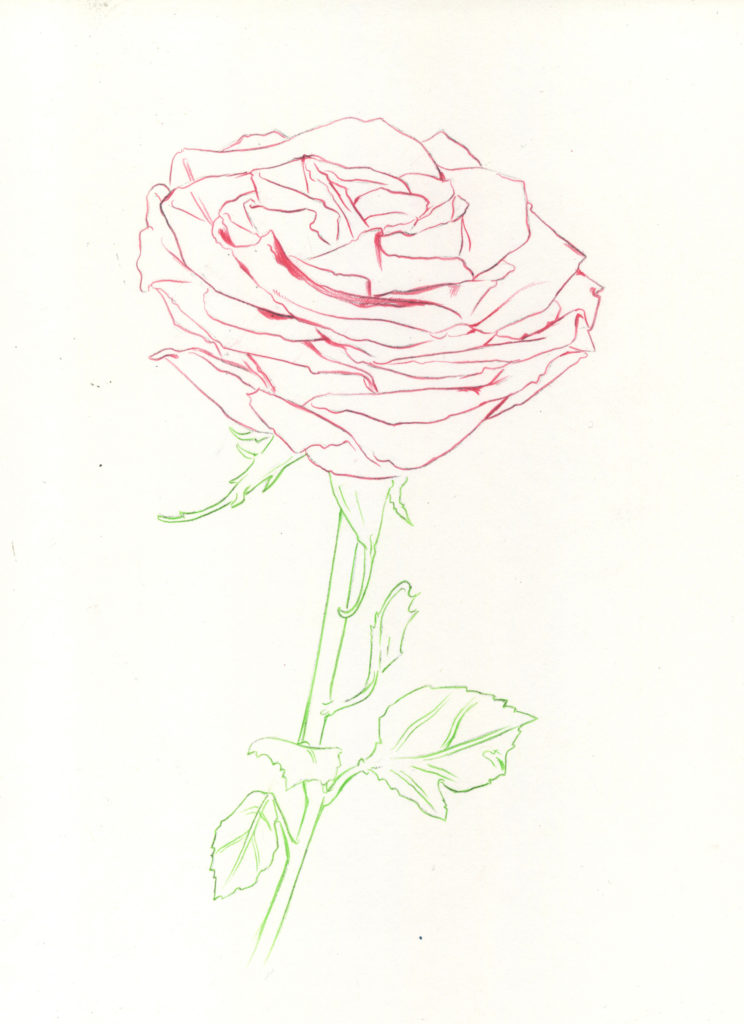
Drawing roses starts with the basic shapes and outline of the rose and its stalk and leaves. In this drawing, the outline for the rose is Faber Castell Polychromos in Tuscan Red. The leaves and stem are in Leaf Green. Of class, any colour variation will work likewise depending on what you have on hand.
Stride ii

Let us break it down and begin with the rose blossom. In this drawing, the outline for the rose is Faber Castell Polychromos in Tuscan Red. The petals of a rose were once tightly encased in a bud. Imagine a bloomed rose every bit the petals bursting out from their original space. Begin from the eye with smaller petal forms and gradually make them larger as you draw outwards. Too have note that the form of the rose is a series of alternately overlapping petals. They do not grow in fifty-fifty rows.
Step 3

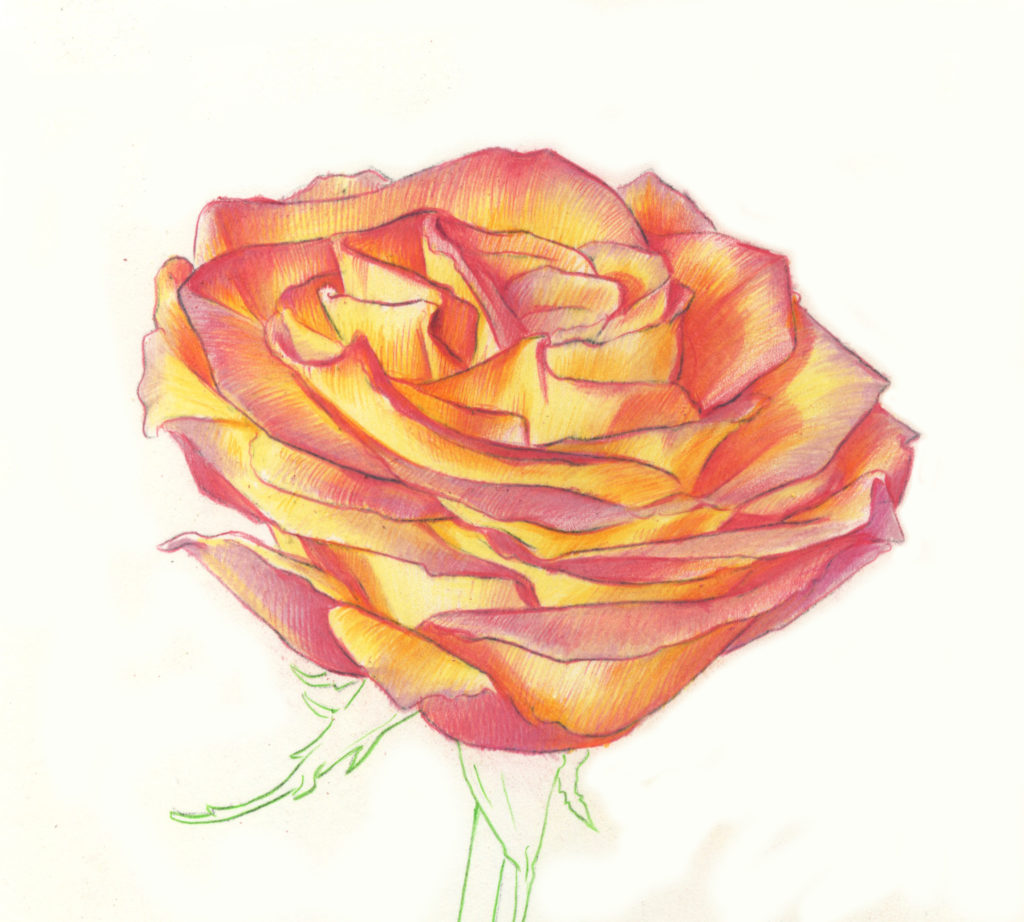
Lay down a base color of Prismacolor Cream, making sure to leave out some outer edges to maintain highlights. Have a sharp pencil and keep your strokes in uniform directions for each petal.
Stride 4
Gradually darken the rose with Nighttime Chrome Yellowish as the next footstep towards adding depth. Once again, sharpen your pencil and follow the direction of the curve of the petals. Make short deliberate marks from the inside out with the tip of your pencil. Remember, y'all tin can rotate your drawing to more comfortably make your marks in the management that y'all please.
Step 5
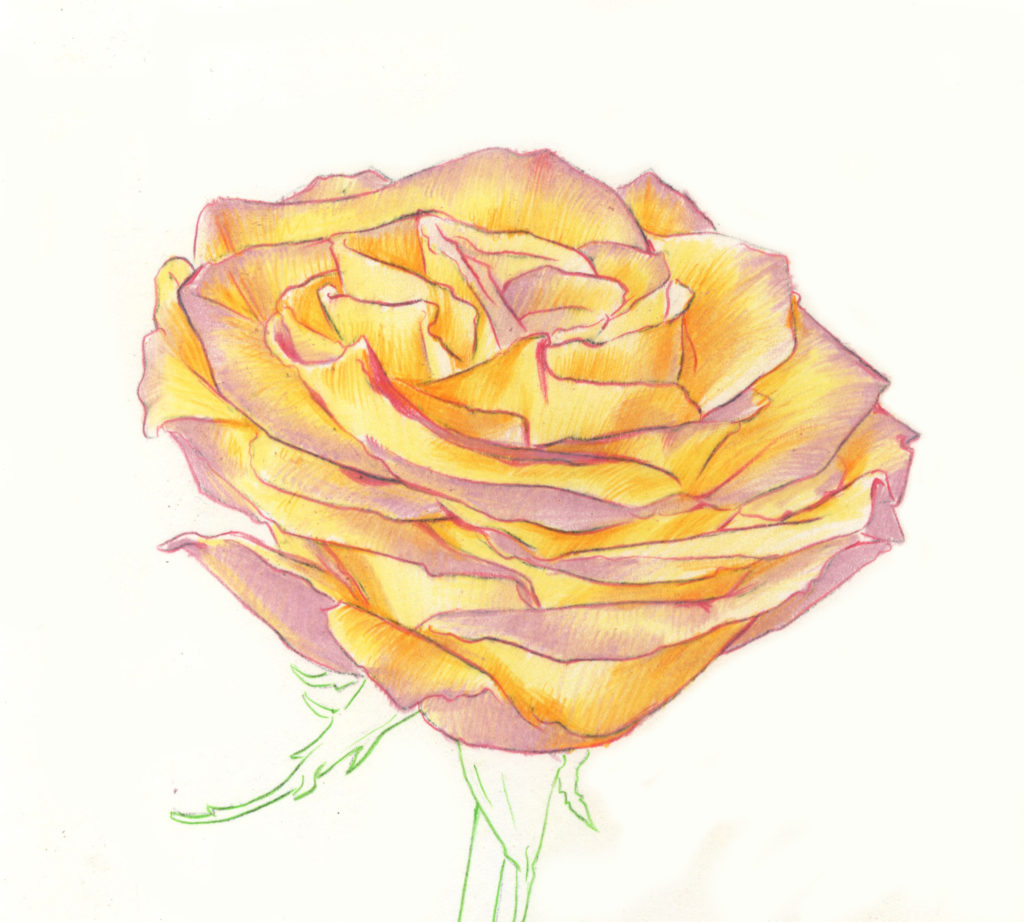
This is a yellow and red rose after all. Each petal bleeds from xanthous to pinkish and ruby towards the edges. Using Derwent in Ash Rose, add the base pink color to the outer edges of the petals. Information technology is best to use a abrupt pencil tip and offset from the outer edge and brand your way with pocket-size strokes towards the center. This keeps the edge of the rose darker and cleaner.
Stride 6
Side by side, push the colors fifty-fifty further with Faber Castell Rose Reddish. This will make the red bleed more and create dissimilarity from the xanthous base colors.
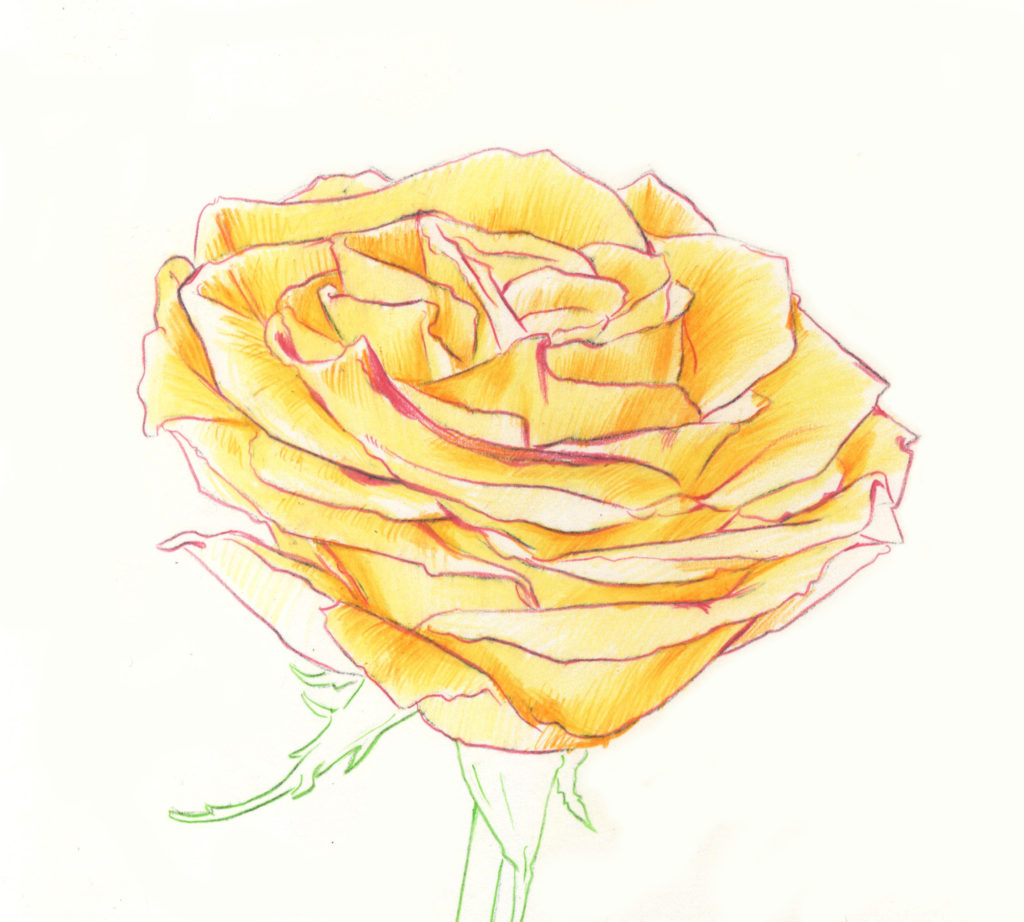
Step 7
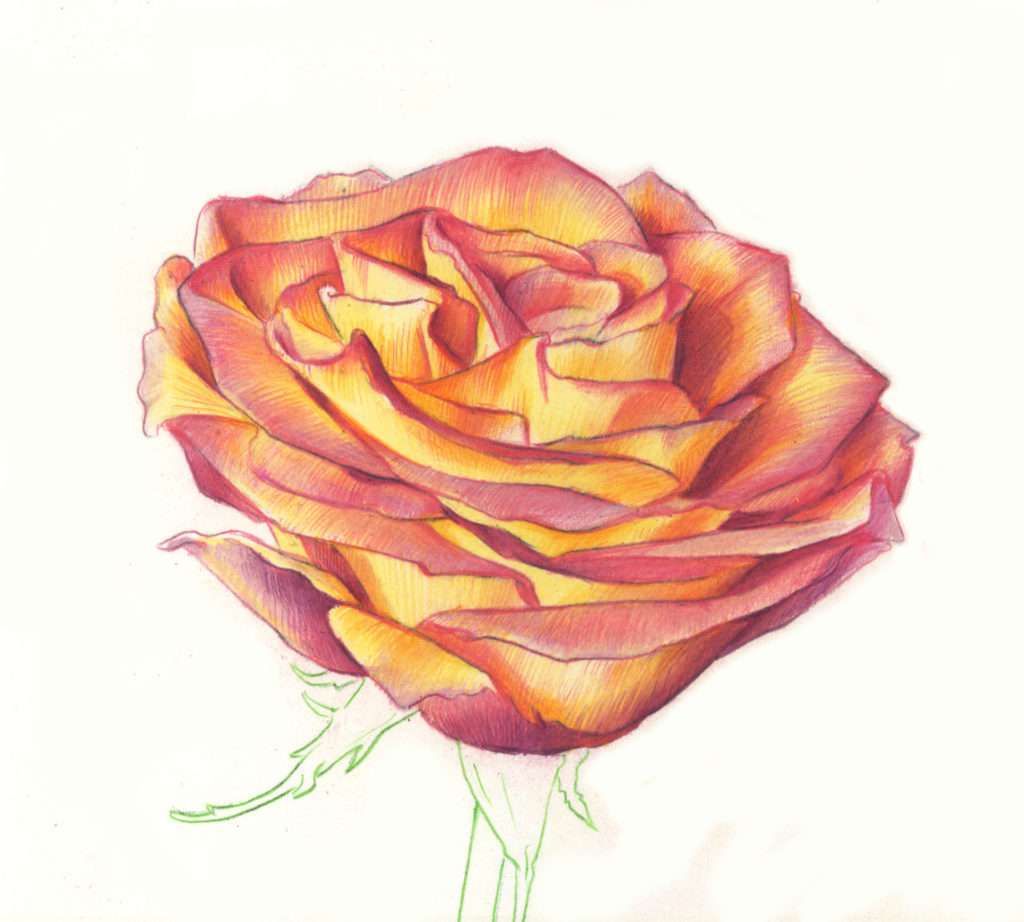
Finally, add together some darks. Employ a nice precipitous Faber Castell Red Violet. This will create rich variations between the petals also as add depth and contrast. Be sure to non add besides much shadow as well evenly onto every nook and cleft. This might flatten your image. Make a note to give each petal its ain character and motion. Adding folds and pocket-size pits and splits tin can brand the drawing announced more lifelike and appealing.
Stride 8
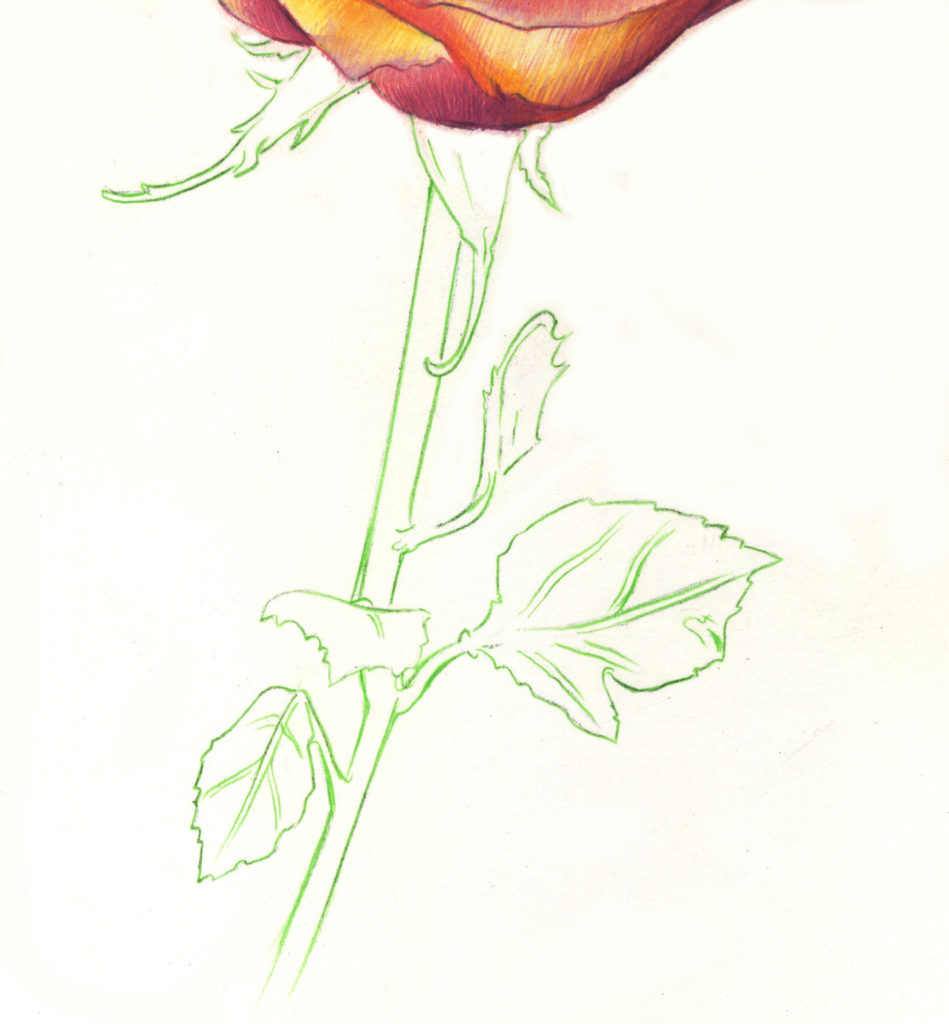
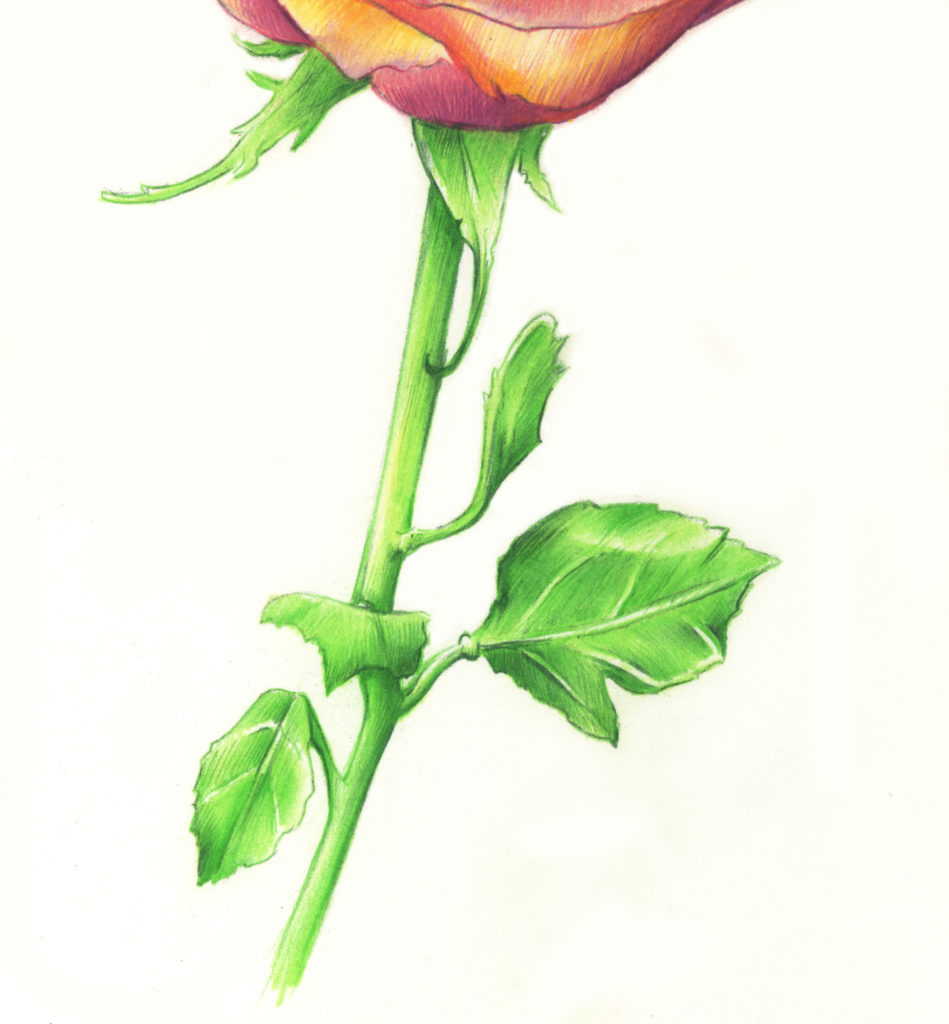
When y'all are fix, move onto the stem and leaves. Outline with Faber Castell Foliage Green. The stem is the resting place of a rose, holding everything upwardly. Information technology should be sturdy and thick. Leaves tend to grow randomly and will face up different directions. The unpredictability is natural. Try not to make the leaves besides evenly spaced.
Pace ix
Create a base color with Prismacolor Foam and Faber Castell Light Green. Be sure to maintain highlights. Using sharp pencils, render the leaves with niggling strokes from the stem out. And when filling in the stalk itself, make your marks going up and down the stalk. This will create the illusion that the rose is shooting upwards.
Step 10
Go a shade darker with Foliage Green in one case again. Making sure to utilise this opportunity to betoken areas where you would similar to add together depth, such every bit right underneath the leaves and where the rose meets the stem. Be certain to use a sharp pencil and to shade in the management of the curve of each surface.
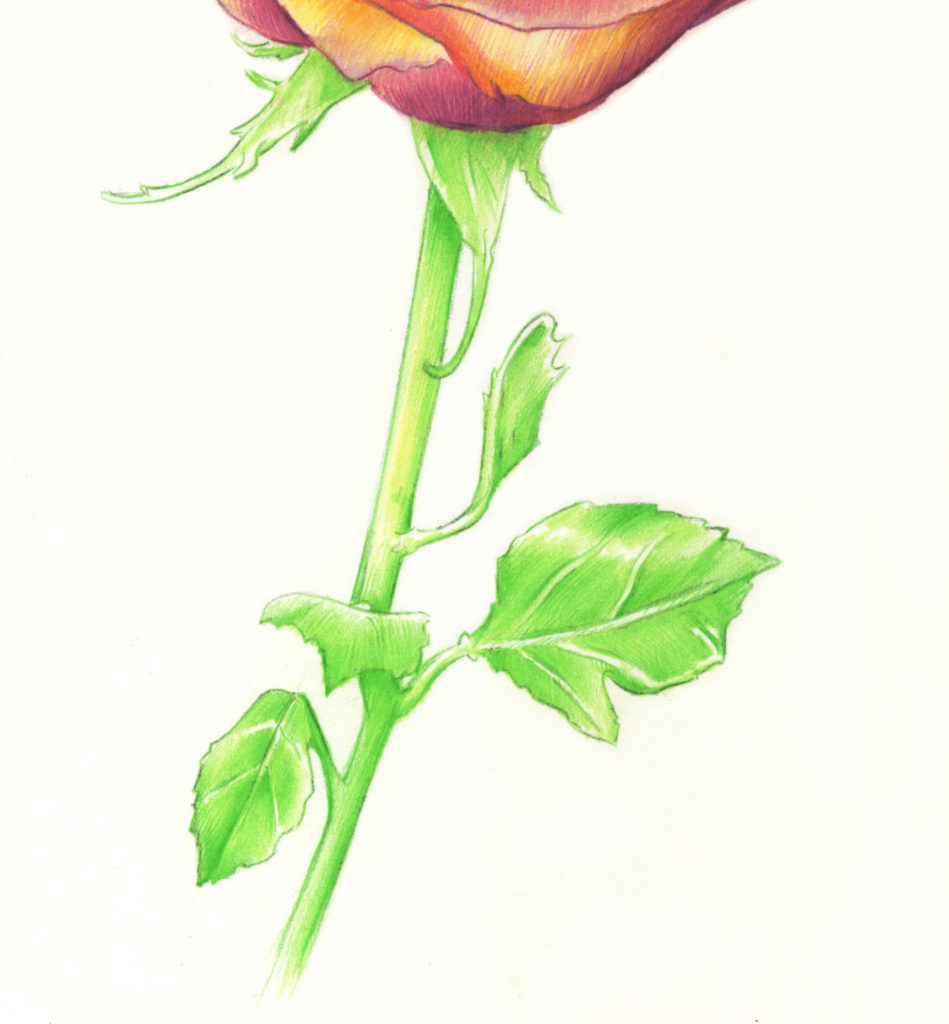
Footstep 11
Go farther still with the play of depth and perspective. Apply a sharp Pine Green to acuminate edges and mark out particular existing details.
Step 12
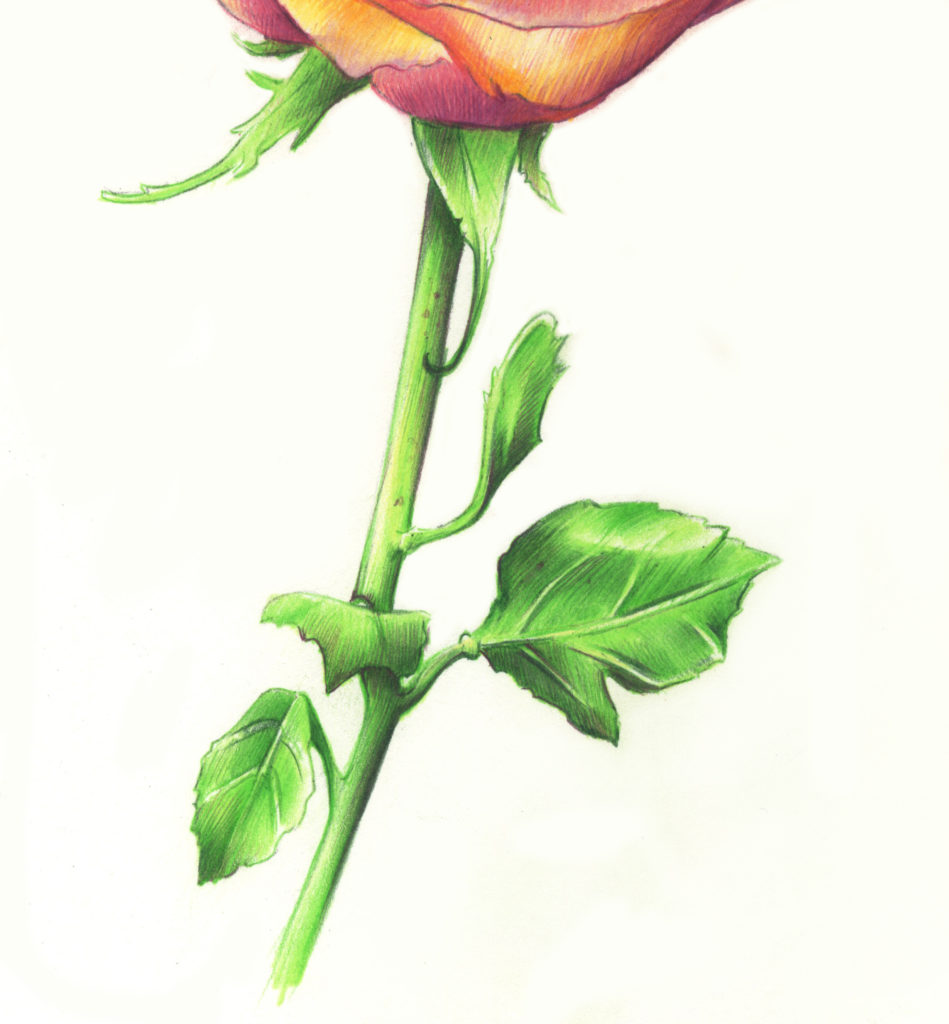
Give the rose a story by adding pits and holes and rips into the greens.
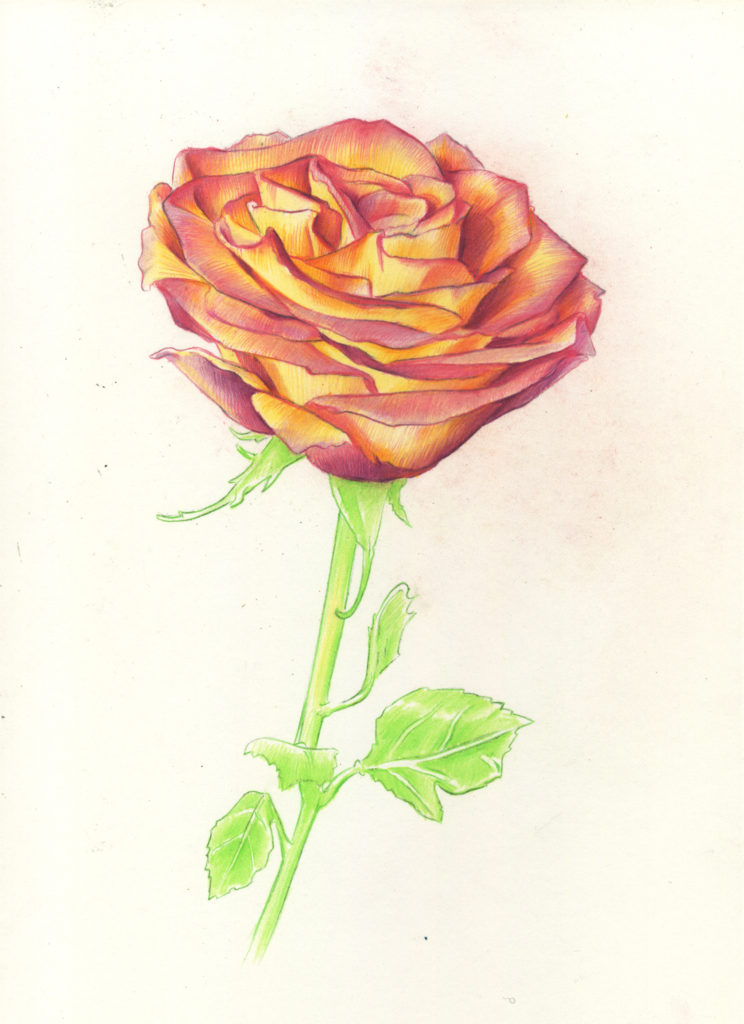
Last Stride
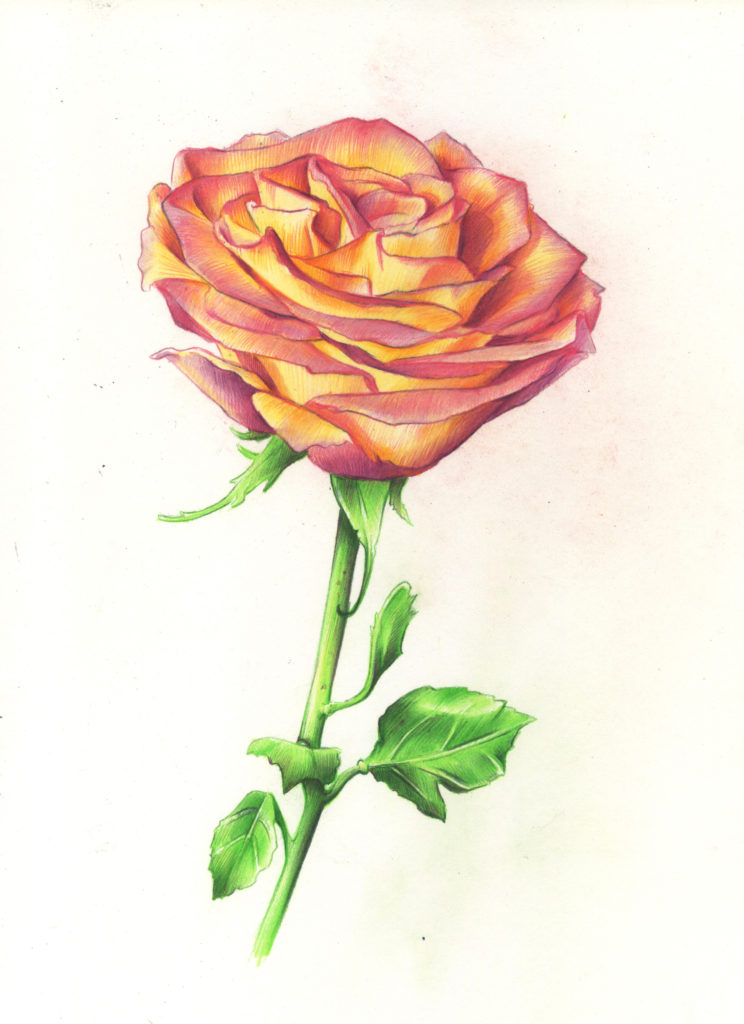
Finally, tie the whole cartoon visually together by going back to the Red Violet that was used to complete the rose. Use this opportunity to make things pop. Darken your darks and add lovely detailing to the stem.
Drawing Roses in Graphite Pencil
Pace 1
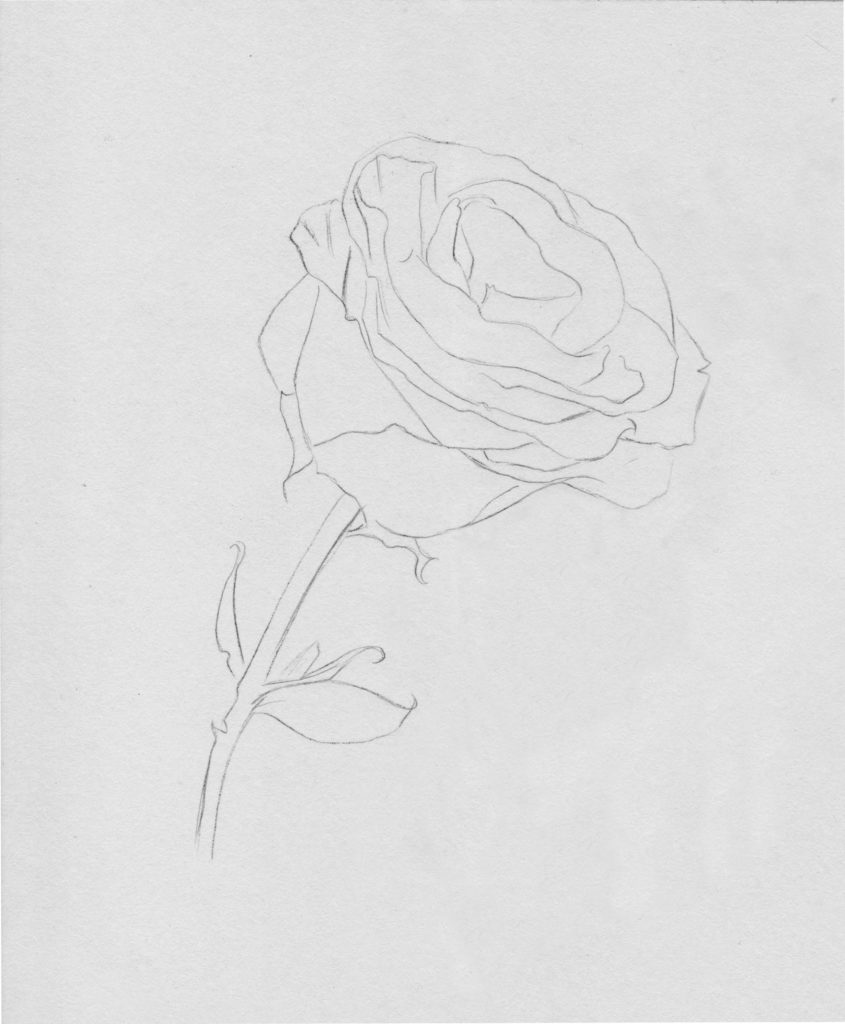
When cartoon roses with graphite pencil, it's best to start with a light pencil, such as a 3H. And ever have a kneaded eraser set up for clean adjustments. I similar a prissy dull pencil when I do preliminary sketches. Piece of work loose and fluidly to get-go.
Step 2

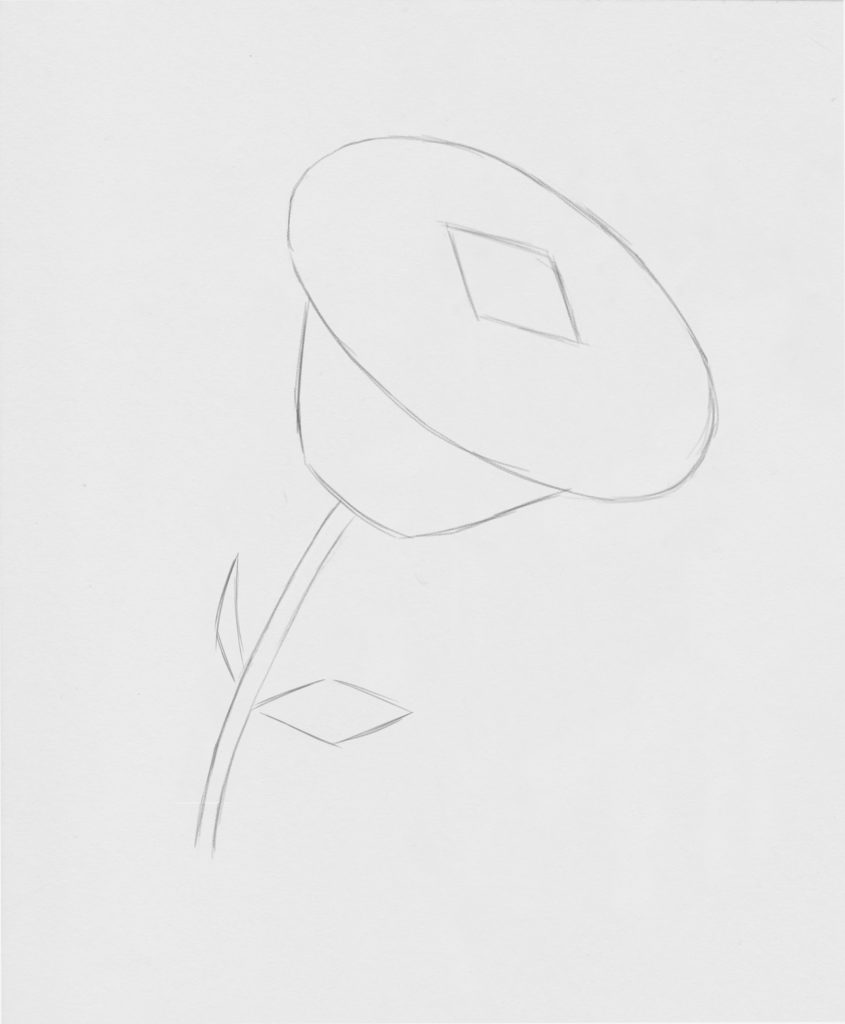
The rose is a lovely bundle of petals that splay out from the stem, upwardly and out. As we move abroad from the base of operations, the petals open up upwards wider. Therefore, we get-go sketch out the round top form of the bloomed rose. Add a guide indicating the eye of the rose. Remember to consider perspective. In this case, the rose is upturned and the center will appear further upward from center. The base is virtually like a rounded cup or basin. With the stem holding upward the whole structure. Outset drawing the petals from the centre of the rose.
Steps 3, four, and v


Equally we sketch in the petals, nosotros are using almost broad C'south or D's. The petals practice non abound in patterns nor do they course in a directly row. Instead, they alternately overlap, getting larger and wider the further out from the center we get.
Step 6
After we have sketched in the basic rose shape, adjust the drawing with tiny details such as sharper or rounded edges. Remember to add a few flourishes such every bit a bend of the leaves if you desire. Utilise your kneaded eraser to make clean up any excess sketch lines.
Step 7

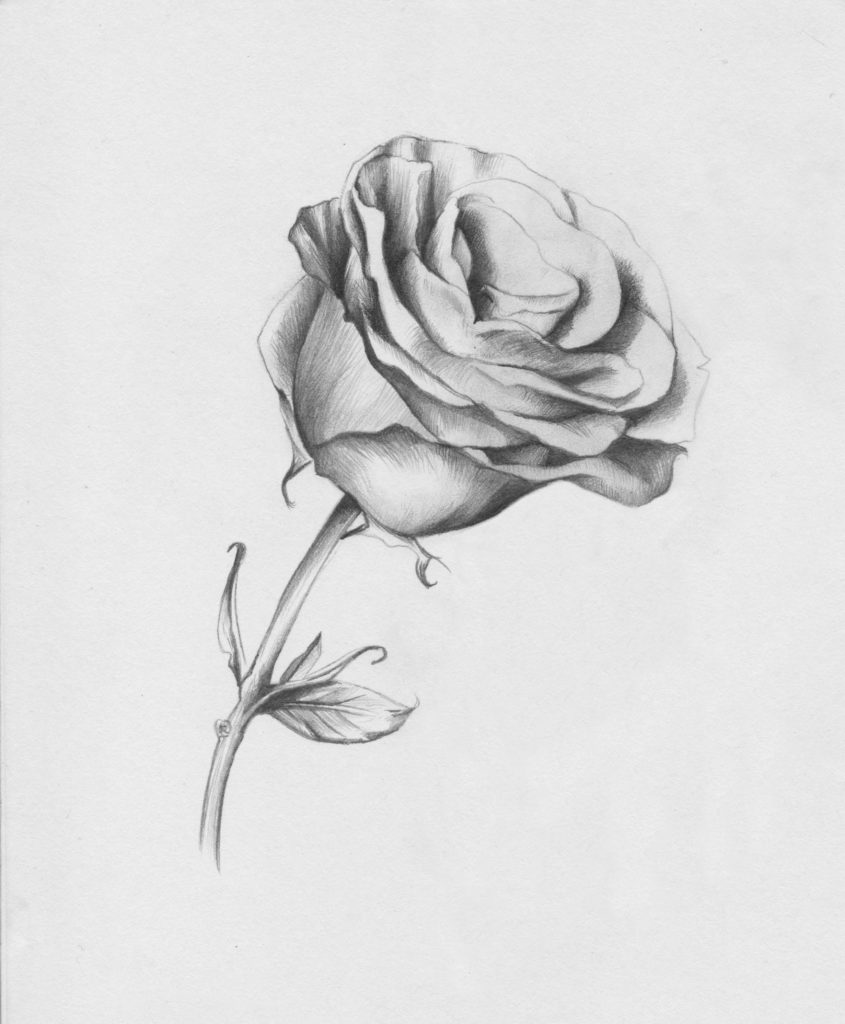
When calculation shadow, likewise offset from inside the rose. I prefer a light pencil such every bit an H to get-go indicating where I want to darken. A lighter pencil is nice because it volition exist easier to clean upward. It is likewise the beginning stages and you want to offset out more than deliberately.
Step viii

While shading, use the tip of the pencil to make piffling strokes. Brand your marks with consideration to the curve of the petal and the leaves. I prefer to draw from the inner petal towards the outer edge of the petal and the leaves from the stem outward, lightening up as I get to the outer edge.
Step 9

Start gradually using darker pencils. Graduate to HB and then to heavier B or 2B to add together intense cast shadows. This will add drama and create contrast.
Step 10
Use a sharp HB pencil to add a small break to the stem as well as a thorn or a little pitting. Y'all tin can also make clean up the outer lines with a nice precipitous 2H.
Step 11

Details are of import. Petals and leaves take a trend to curve, curl, coil, fold and crinkle. Some parts besides have small breaks, holes and splits. These touches create character. Imperfection tin add a wild and lifelike quality. Retrieve: In nature, every bit well as in fine art, perfection tin look a petty out of place.

Source: https://www.artistsnetwork.com/art-mediums/colored-pencil/drawing-roses/
Posted by: gablewhiparinkes54.blogspot.com
0 Response to "How To Draw Madagascar Characters And Color With Prismacolor"
Post a Comment